Take Control of Your Car’s Safety
I have learned to do maintenance myself. I have learned that maintenance saves me money because the price of auto repair keeps going up in 2025-2026. Replacing brake pads is a do-it-yourself job. A single axle car brake pad replacement, at a shop can easily cost from $300 to $600. The parts, for brake pad replacements often cost a part of that price.
Knowing how to change claim brake pads saves you money. Changing claim brake pads gives you control, over the safety system in your vehicle. The step-by-step guide shows you how to change claim brake pads. The step-by-step guide makes any job easy and safe for anyone who follows the guide. The step-by-step guide updates the steps for 2025-2026 spec vehicles. I have used the step-, by-step guide. The guide saved me time and money.
Brake Pads in Depth (2025–2026 Basics)
I have learned that brake pads are the heart of the plate brake system. When I press the brake pedal the caliper squeezes the brake pads against the rotor. The brake pads grind the rotor. The grinding slows the vehicle. I see brake pads work. The material that makes the brake pads guides the brake pads behaviour:
Ceramic: Drivers use Ceramic as the standard. Ceramic is quiet Ceramic leaves dust and Ceramic provides performance. I have tried brake pads. I recommend choosing Ceramic over other types, for the car brake pad replacements in 2025-2026.
Metallic brake pads are made of metal filaments. Semi-Metallic brake pads stay tough. The heat is handled well by Metallic brake pads. Semi-Metallic brake pads work well in the trucks that tow and, in the cars that are driven hard. When I use brake pads I hear a more noise. Semi-Metallic brake pads also create brake dust.
Organic (NAO) feels smoother and milder, than the chemicals. I notice that Organic (NAO) works easier, on the rotors. Organic (NAO) wears out sooner. Organic (NAO) is becoming less common now.
I notice that the front brake pads usually last, between thirty thousand and sixty thousand miles. I have heard the front brake pads make a pitched screech when the wear indicators touch the rotor. I have felt the front brake pads pound when metal touches metal. I have seen the front brake pads cause stopping distances when the front brake pads are worn. I have felt the front brake pads make the steering wheel vibrate when you press the brakes. The front brake pads need care.
Apparatuses and Materials Needed
I always get the equipment before I start. The right equipment makes a safe car brake pad replacement possible. The right equipment you need includes:
New Brake Pads: New Brake Pads replace the pads in the pivot sets. I do not skip the step of installing New Brake Pads on both wheels.
I have tried it. The jack does not work under the car. The jack stands also do not work under the car that sits on the jack.
Lug Wrench/Socket Set: for removing the wheel.
C-clamp or cylinder compression tool: To retract the caliper piston.
Brake Cleaner:
When I use the brake cleaner the brake cleaner cleans the caliper and the rotor.
The brake cleaner does not clear out residue.
High-Temp Brake Oil: For lubricating contact points to prevent squeal.
Torque Torque: Needed for the correct tightening of caliper shock and carrier nuts.
I always wear Safety Glasses & Gloves. I feel safe because Safety Glasses & Gloves protect my eyes and my hands from the brake cleaning and the sharp edges.
OBD2 Scanner. The 2025‑2026 vehicles have brakes that stop. I notice that the brake needs an OBD2 Scanner to put the brake into benefit mode.
Safety Precautions First
Your security is the number one priority.
I park the vehicle on the asphalt driveway, the driveway or the garage floor. I press the parking brake. I place the tire chocks under the lift wheels.
I always disconnect the battery cable before I reset the stopping brake on the car. You must disconnect the battery cable before you proceed.
Caution with Hybrid/EV: Some hybrid vehicles and some electric vehicles have brake systems because regenerative braking is used. The brakes can be tricky. I always read the owners manual for the vehicle to know the steps. If I am ever, in doubt the safest thing to do is seek a professional, for the vehicle.
Step-by-Step Instructions
Release Haul Nuts
I always loosen the lug nuts on the car before I jack up the car. I use a torque wrench or a socket to loosen the lug nuts on the car. That way the car lifts safely.
Jack Up and Support the Vehicle
First locate the manufacturer recommended jacking point on the side sill. Then I recheck the jacking point before lifting the car. Then I raise the car to a height that lets a jack stand sit under a framing point. I repeat the step, for the side. Next I make sure that the car is stable, on the jack stands before I proceed.
Release the Wheel
Now pull the haul nuts all the way back. Then carefully pull the wheel off.
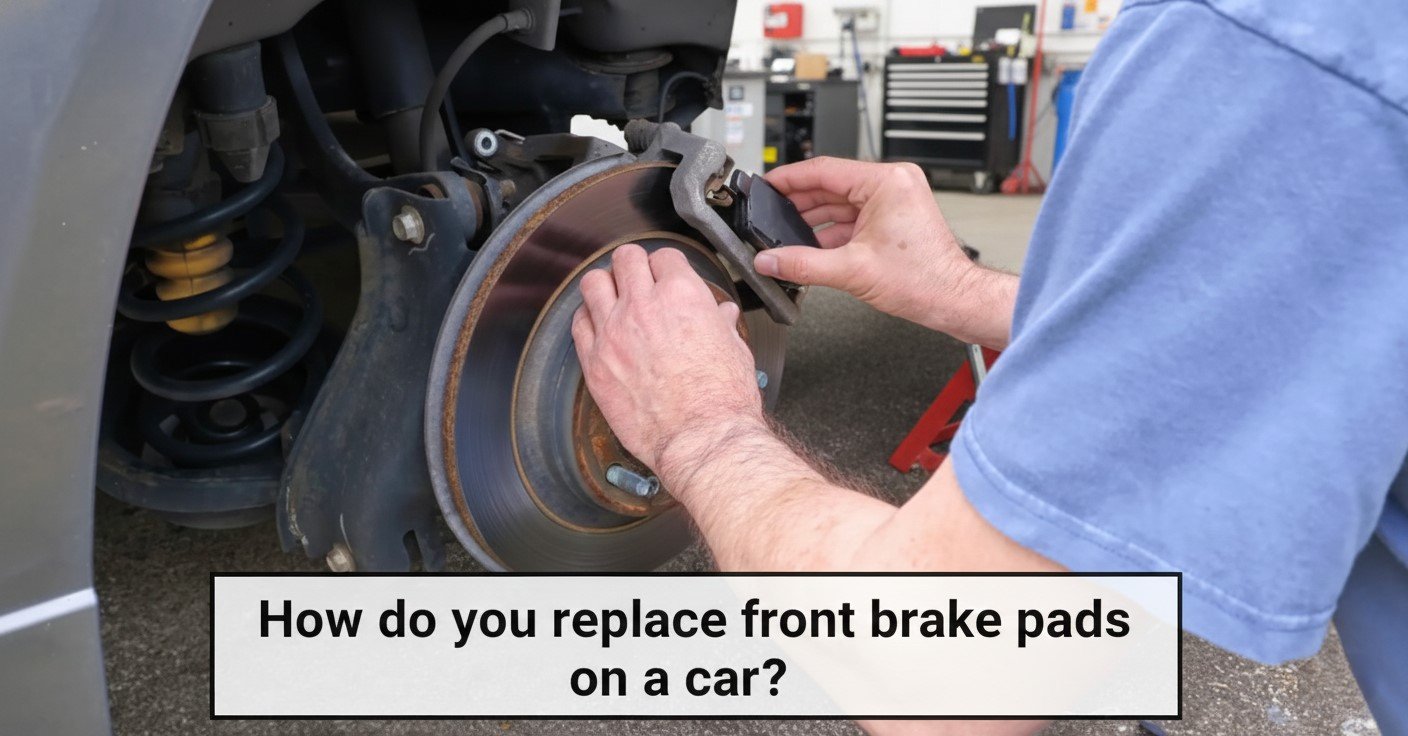
Accessing the Brake Caliper
First find the two caliper bolts, on the side. Use your attachment set to take out the caliper bolts. Pull the caliper off the rotor. Do not let the caliper hang from the brake hose. I like to hang the caliper on a wire or a bungee cord.
Remove Old Brake Pads and Inspect Rotors
First I slide the pads out of the caliper bracket. Then I look at the rotors. I check the rotors, for grooves, cracks or blue spots that show overheating. The 2025–2026 industry standard now leans toward rotor replacement than resurfacing because the OEM rotor’s thinner and lighter.
Compress the Brake Caliper Piston
The cushion is thicker. The thicker cushion pushes the cylinder back, into the caliper. I take the brake cushion. I set the brake cushion over the cylinder. I use a C‑clamp. I slowly squeeze the C‑clamp until the cushion is fully seated.
Critical note: I have seen that on vehicles that have parking brakes the procedure starts with an OBD2 scanner that puts the system into advantage mode. Do not apply force to the piston before the system is, in advantage mode. Applying force to the piston without putting the system into advantage mode can damage the caliper motor. The caliper motor can be ruined if the piston is forced before the system is, in advantage mode.
I install the brake pads
Clean the caliper bracket with brake cleaner and a wire brush. Apply a lean layer of high-temperature brake oil to the metal contact focuses on the bracket, not to the cushion contact surface! Slide the unused cushions into place.
Reassemble the Caliper
Carefully slide the caliper back over the unused cushions and rotor. Reattach the caliper jolts and use your torque torque to secure them to the manufacturer’s determination.
Reinstall Wheel & Lower the Car
I reinstall the wheel. Hand tighten the lug nuts. I feel the wheel settle as I do it. I lower the car to the ground. I take the torque wrench. Place it on the lug nuts. I tighten the lug nuts in a star pattern, to the spec.
Pump the Brake Pedal
Before I start the car I press the brake pedal down a times until the brake pedal feels firm. The brake pedal pressure comes back when I press the brake pedal again. Then I start the car. I feel the brake pedal again. I do not move until I know the brake pedal will stay firm. I always make sure the brake pedal is firm before I go.
The Break-In (Bedding) Process
New pads need a break‑in. When I put pads on the break‑in, called bedding puts a layer of fabric on the rotor. The 2025 Ceramic pads need a break‑in. The break‑in is needed to get the performance of the 2025 pads.
Find a safe, deserted road.
Speed up to 45 mph, then gently brake down to 10 mph. Do this 5-6 times.
I avoid a stop whenever I do this. I also never ride the brakes at a stop.
Now drive for a minutes. Do not press the brakes while you are moving. Let the brakes cool.
Common Mistakes to Avoid
I always check the torque. Overtightening the torque makes the bolt jolt. Undertightening the torque also makes the bolt jolt. Those jolts are dangerous.
If you forget to grease the brakes the brakes become noisy. The wear, on the brakes is uneven.
Reuse of Hardware:
When the hardware is reused the clips and springs become worn. Those worn clips and springs make the cushions stick and wear unevenly.
Not checking brake liquid:
The reason is that in the ace barrel the liquid level rises as the cylinders are pushed back. I watch the level so that the liquid does not overflow.
When DIY is not an idea, for you
You can often do many of the car brake pad replacements yourself. Hire a professional for the car brake pad replacements if:
I have checked the car. The car has a parking brake. The electronic parking brake will not reset.
I see that the rotor is worn out or bent. I think the rotor should be replaced soon as possible.
When I look under the car I see a brake fluid leak. When I press the brake I feel a pedal. The brake fluid leak and the spongy pedal both appear. A brake fluid leak or a spongy pedal can point to the problem.
The vehicle has driver-assist systems. I need to calibrate the driver-assist systems before the driver-assist systems work right.
Taken a toll Breakdown in 2025–2026
I measured the DIY cost at $100 to $250. DIY cost includes cushions, the equipment and the supplies.
Professional Replaced cost: $300 – $600+, depending on parts and labor.
I find the DIY method saves me between fifty and seventy percent of the cost I would otherwise pay. The DIY method is a car maintenance skill, for any car owner. I have found that doing car brake pad replacements gives confidence and saves hundreds of dollars. I have used the DIY method on my car.
The DIY method worked. Follow this guide use the tools and stay careful about safety, at each step. The steps show that the vehicle stops safely. The steps also show that the vehicle stops reliably. Going into 2025-2026 the car world keeps changing. I know that being proactive, with brake care saves money. Brake care is also a part of being a car owner. The more you pay attention to brake care the your car stays.
.